
Let’s be honest chicken breasts get all the love, but they’re also the easiest to dry out. Chicken thighs? They’re the reliable friend who always shows up. Juicy, forgiving, and packed with rich flavor, chicken thighs stay tender even if you accidentally leave them on the stove an extra five minutes.
This article isn’t one single recipe it’s a toolkit. I’m sharing three different flavor-packed chicken thigh recipes that cover weeknight speed, weekend depth, and even a lighter option. Whether you’re feeding a family, meal-prepping for yourself, or just tired of bland chicken, these recipes will actually make you excited about dinner.
Let’s get into why thighs deserve the spotlight, then walk through each method step by step.
Why This Recipe Works
Chicken thighs have more fat and connective tissue than breasts. That sounds like a bad thing, but it’s magic. When heat hits that fat, it renders and bastes the meat from the inside. The connective tissue breaks down into gelatin, which gives you that silky, almost velvety texture.
Here’s the simple logic behind each version:
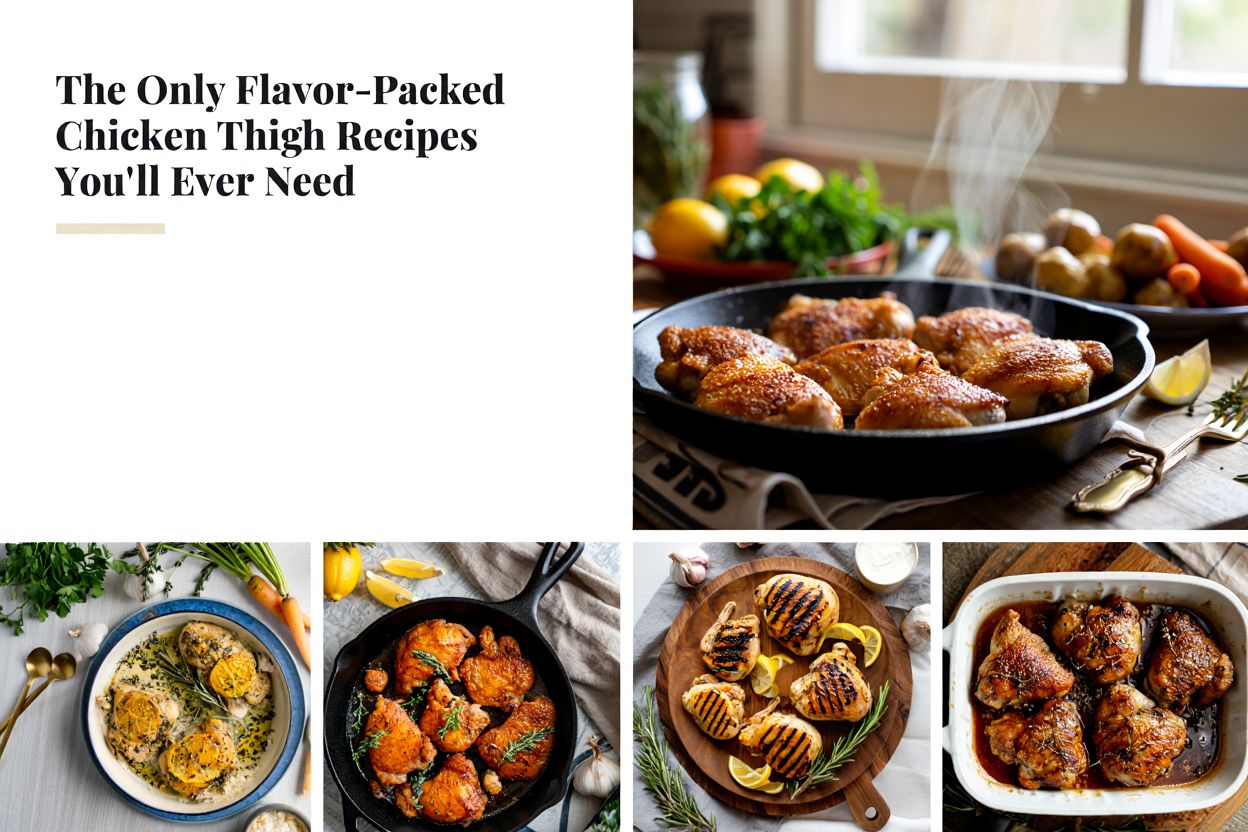
- Pan-seared garlic herb thighs rely on high heat for a crispy, golden crust while the inside stays plush. No marinade needed just salt, patience, and a hot pan.
- Sticky soy-ginger baked thighs use a glaze that caramelizes in the oven. The sugar in the glaze helps browning, and the acidity from rice vinegar balances the richness.
- Mediterranean sheet pan thighs with veggies is a one-pan solution. The vegetables roast in the chicken drippings, and everything finishes at the same time.
No complicated techniques. No hard-to-find ingredients. Just real cooking that works.
Ingredients
Garlic Herb Pan-Seared Thighs (serves 4)
- 6 boneless, skinless chicken thighs – Boneless cooks faster; skinless keeps it simpler for weeknights.
- 1 tsp kosher salt – More than you think. Thighs can take it.
- ½ tsp black pepper
- 2 tbsp olive oil – High heat means avoid butter here (it burns).
- 4 garlic cloves, smashed – Smashed, not minced. Minced burns; smashed infuses gently.
- 3 sprigs fresh thyme or rosemary – Woody herbs hold up to high heat.
- 1 tbsp butter (optional, for finish) – Adds gloss and richness at the end.
Sticky Soy-Ginger Baked Thighs (serves 4)
- 6 bone-in, skin-on chicken thighs – Bone keeps meat moist; skin gets crispy.
- ¼ cup low-sodium soy sauce – Regular soy sauce is too salty for a glaze.
- 2 tbsp honey – For stickiness and browning.
- 1 tbsp rice vinegar – Cuts through sweet and savory.
- 2 tsp fresh ginger, grated – Much brighter than dried powder.
- 3 garlic cloves, minced
- 1 tsp sesame oil
For Mediterranean Sheet Pan Thighs (serves 4)
- 6 boneless, skinless chicken thighs
- 1 red bell pepper, sliced
- 1 zucchini, sliced into half-moons
- 1 red onion, wedged
- 1 pint cherry tomatoes
- 3 tbsp olive oil
- 1 tbsp dried oregano
- 1 lemon, juiced
- Salt and pepper
Equipment
- Large stainless steel or cast-iron skillet (for pan-seared version)
- Baking sheet (for baked and sheet pan versions)
- Parchment paper or foil (easier cleanup)
- Mixing bowls
- Tongs
- Instant-read thermometer (helpful but not required—thighs are forgiving)
Step-by-Step Instructions
Pan-Seared Garlic Herb Thighs (15 minutes active)
- Pat thighs completely dry with paper towels. Moisture is the enemy of browning. If they’re wet, they’ll steam instead of sear.
- Season generously with salt and pepper on both sides. Don’t be shy thighs are thick enough to take a solid coating.
- Heat oil in a skillet over medium-high heat until it shimmers. Test by dropping a tiny piece of chicken in it should sizzle immediately.
- Place thighs in the pan in a single layer. Don’t crowd them. Cook in two batches if needed. Listen for that loud, aggressive sizzle that’s browning happening.
- Leave them alone for 5–6 minutes. No flipping, no poking. Wait until the edges look golden brown and the thigh releases easily from the pan. If it sticks, it’s not ready.
- Flip and add smashed garlic + herbs. Cook another 4–5 minutes. The second side browns faster.
- Add optional butter in the last minute, tilting the pan and spooning the butter over the chicken. You’ll smell nutty, toasty garlic.
- Rest for 3 minutes before serving. The juices redistribute internally.
Sticky Soy-Ginger Baked Thighs (10 min active + 30 min bake)
- Preheat oven to 400°F (200°C).
- Whisk soy sauce, honey, rice vinegar, ginger, garlic, and sesame oil in a bowl. The honey will make it thick.
- Pat thighs dry and season with just a pinch of salt (soy is salty). Place them skin-side up on a lined baking sheet.
- Brush half the glaze over each thigh. Don’t drown them a thin layer is enough.
- Bake for 25 minutes. The kitchen will smell like sweet, savory caramel.
- Brush remaining glaze on and bake another 5 minutes. The skin should look dark brown and glossy, not black.
- Visual cue: The glaze should bubble and look like candy. If edges look burnt, they’re overdone but thighs forgive quickly.
- Rest 5 minutes then drizzle any pan juices over top.
Mediterranean Sheet Pan Thighs (15 min active + 30 min roast)
- Preheat oven to 425°F (220°C). Higher heat = crispier vegetables.
- Toss bell pepper, zucchini, onion, and tomatoes with 2 tbsp olive oil, oregano, salt, and pepper.
- On a lined baking sheet, spread vegetables evenly. Nestle chicken thighs right into the vegetables, not on top. This lets the chicken drip into the veggies.
- Drizzle chicken with remaining 1 tbsp oil, lemon juice, and more salt.
- Roast for 25–30 minutes. The tomatoes should burst, zucchini should have brown edges, and chicken should reach 165°F internally. Feel the chicken it should be firm but springy, not hard.
- Finish with fresh lemon juice and maybe parsley if you have it.
Pro Tips
- Patience = browning. If you flip chicken too early, the crust sticks to the pan and you lose all that flavor. Wait until it releases naturally.
- Dry brine when you can. Salt thighs and leave them uncovered in the fridge for 1–2 hours. The surface dries out, which means crunchier skin (for skin-on) and better sear.
- Use a heavy pan. Thin nonstick pans don’t hold heat. Cast iron or stainless steel gives you that consistent, deep brown crust.
- Save the pan drippings. After pan-searing, deglaze with a splash of broth or water, scrape up the brown bits, and drizzle over rice or roasted vegetables. That’s liquid gold.
- Don’t trust the timer, trust your senses. Thighs are safe at 165°F but actually tastier at 175–185°F because more connective tissue breaks down. They don’t dry out like breasts.
Common Mistakes to Avoid
- Skipping the pat-dry step. Wet chicken = steamed chicken = pale, rubbery skin (or no crust at all).
- Overcrowding the pan. If thighs touch each other, they trap steam. They’ll turn grey instead of brown. Cook in batches.
- Using low heat to avoid smoke. Low heat melts fat without browning it. You need medium-high heat for the Maillard reaction (that’s the science of golden-brown deliciousness).
- Adding garlic too early. Minced garlic burns in 60 seconds over high heat. Add it late in cooking or use whole smashed cloves.
- Not resting the meat. Slice into a thigh straight from the oven and juices run all over the cutting board. Rest 3–5 minutes and those juices stay inside.
Variations
- High-protein, low-carb: Skip honey in the sticky glaze. Use allulose or monk fruit sweetener, or just double the ginger and garlic for flavor. Pair with cauliflower rice.
- Spicy harissa version: Replace oregano in the Mediterranean recipe with 2 tbsp harissa paste. Add chickpeas to the sheet pan for fiber and protein.
- Creamy coconut curry thighs: After searing thighs in a pan, remove them. Sauté onion and curry paste, then add 1 can coconut milk and ½ cup broth. Return thighs and simmer 15 minutes. Serve over rice.
- Air fryer adaptation: For crispy skin in half the time, cook bone-in thighs at 380°F for 18–20 minutes, flipping halfway. No preheating needed.
Storage & Meal Prep
Fridge: Store cooked thighs in an airtight container for up to 4 days. Keep sauce separate if possible, so thighs don’t turn mushy.
Freezer: Freeze for up to 3 months. I freeze them flat on a baking sheet first (so they don’t stick together), then transfer to a bag.
Reheating: The microwave makes skin sad. Reheat in a skillet over medium-low with a splash of broth or water. Cover with a lid for 2 minutes, then uncover to crisp. For baked thighs, use an oven at 350°F for 8–10 minutes.
Meal prep move: Cook a double batch of sheet pan thighs on Sunday. Portion into containers with quinoa or roasted potatoes. By Thursday, they’re still delicious.
Nutrition Benefits
Chicken thighs are higher in calories than breasts, but that comes with upsides. They provide more iron and zinc (thanks to the darker meat). The fat keeps you full longer, so you’re less likely to snack an hour after dinner.
In the Mediterranean version, you get lycopene from tomatoes and vitamin C from bell peppers. The soy-ginger glaze uses ginger, which has natural anti-inflammatory compounds. And because all these recipes use real fats (olive oil, butter, sesame oil) instead of processed sauces, you’re getting flavor from whole ingredients.
No magic health claims here just honest cooking with nutrient-dense foods.
FAQ
Can I use chicken breasts instead of thighs?
You can, but reduce cooking time by about 30% and check temperature early. Breasts dry out past 165°F. For the sticky soy version, pound breasts to even thickness first.
Why are my chicken thighs rubbery?
Two likely reasons: you cooked them at too low heat (they steamed instead of seared), or you used woody breast syndrome chicken. That’s a muscle issue in some factory-farmed birds. Try buying air-chilled thighs from a local brand.
Do I have to remove the skin before cooking?
No! Skin adds flavor and protects the meat. If you don’t want to eat it, cook with it on then peel it off after roasting. You’ll still get the benefits.
How do I know when bone-in thighs are done without a thermometer?
Pierce the thickest part with a knife tip. Clear juice means done. Pink or red juice needs more time. Also, the meat should pull away from the bone slightly.
Can I grill these recipes instead?
Absolutely. For pan-seared, grill over medium-high direct heat for 5–6 minutes per side. For sticky thighs, par-cook in the oven for 15 minutes, then finish on the grill to caramelize the glaze without burning it.
Conclusion
Chicken thighs don’t need complicated marinades or expensive ingredients to shine. A hot pan, a little patience, and one of these three flavor directions will get you dinner that actually tastes like something. The garlic herb version is your weeknight workhorse. The sticky baked thighs are for when you want that sweet-savory punch. And the sheet pan meal? That’s for nights when you can’t handle another dirty dish.
Try one tonight. Burn the garlic once (we all have). Overcrowd the pan and learn. That’s real cooking.
- Lemon Herb Chicken with Roasted– For readers who want a sticky, savory sauce on a different protein.
- Lemon Herb Chicken & Chickpea Skillet– Another sheet pan dinner with similar timing and bright flavors.
- Crispy Oven-Baked Potato Wedges – The perfect side for those sticky soy-ginger thighs.