
There are some afternoons when the heat feels so heavy you can almost taste it. Last July, during a particularly brutal heatwave, my air conditioner gave up entirely. I found myself staring at a massive, sweet-smelling watermelon on my counter and a half-empty can of coconut milk in the pantry. I wanted something cold, creamy, and impossibly refreshing but I wasn’t about to stand over a stove making a custard-based ice cream.
That’s when I discovered the magic of 3 ingredient watermelon ice cream.
This recipe has genuinely saved my sanity on dozens of sweltering days since then. No ice cream maker required. No weird stabilizers or hard-to-find ingredients. Just whole, real food blended together and frozen into the most luscious, naturally sweet summer dessert you can imagine. My family loves it so much that I now buy double the watermelons during peak season. Today, I’m showing you exactly how I make this 3 ingredient watermelon ice cream so you can beat the heat without breaking a sweat.
Why You’ll Love This Recipe
- Only three real ingredients – That’s it. No artificial colors, no corn syrup, no mysterious preservatives. You can pronounce everything on the list.
- No ice cream maker needed – I don’t own one either. This recipe relies on a simple blender and your freezer. That’s it.
- Ready in under 10 minutes of active time – The hardest part is cutting the watermelon. After that, your freezer does all the work.
- Naturally dairy-free and vegan – My sister-in-law has a dairy sensitivity, and she nearly cried when she tried this. It’s that creamy without any milk or cream.
- Perfectly portion-controlled – Unlike traditional ice cream, this has no added sugar (just nature’s candy) and clocks in at barely over 100 calories per serving.
- My toddler approved this recipe – When I first tested this 3 ingredient watermelon ice cream, my four-year-old ate three bowls in one sitting. She still requests it every single weekend.
Recipe Overview
| Category | Details |
|---|---|
| Prep time | 10 minutes |
| Freeze time | 4–6 hours |
| Total time | 4 hours 10 minutes |
| Servings | 6–8 (about 1 cup each) |
| Calories per serving | Approximately 115 calories |
| Cuisine type | American, Summer |
| Diet type | Vegan, Gluten-free, Dairy-free, Refined sugar-free |
I usually whip up a double batch of this on Sunday morning. By afternoon, we have a week’s worth of dessert ready to go. It keeps beautifully, though fair warning—it rarely lasts more than three days in my house.
Ingredients
Main Ingredients
- 4 cups fresh watermelon – Cubed, seeds removed (seedless watermelon works perfectly)
- 1 can (13.5 oz) full-fat coconut milk – Chilled in the refrigerator overnight
- 2 tablespoons lime juice – Freshly squeezed (about 1 large lime)
Optional for sweeter batch (my kids’ preference)
- 1–2 tablespoons maple syrup or honey – Only if your watermelon isn’t perfectly ripe
My personal substitution notes:
I’ve tested this recipe at least twenty times with different variations. If you don’t have coconut milk, full-fat coconut cream works beautifully it actually makes an even creamier texture. For a lower-fat version, I’ve tried canned light coconut milk, but the ice cream comes out icier and less scoopable. I don’t recommend it.
No lime juice on hand? Lemon juice works in a pinch, though the flavor is slightly brighter and less tropical. My neighbor swears by using 1 tablespoon of apple cider vinegar when she’s out of citrus. I was skeptical, but honestly? It works. You just need that tiny acidity to balance the sweetness and prevent the ice cream from tasting flat.
Step-by-Step Instructions
1. Prepare your watermelon
Start by cutting your watermelon into rough 1-inch cubes. I learned this the hard way: don’t bother making them perfect. You’re about to blend everything anyway. Remove any visible seeds, though seedless watermelon saves you this step entirely.
Pro tip: I always line a baking sheet with parchment paper and spread the cubes out in a single layer. Pop that sheet in the freezer for 20 minutes while you gather your other ingredients. This prevents the dreaded “icy soup” texture I got during my first attempt.
2. Chill your coconut milk properly
This step is non-negotiable. Place your unopened can of full-fat coconut milk in the refrigerator overnight or for at least 6 hours. When you open it, the thick cream should have separated and risen to the top. Don’t shake the can. You want that solid cream layer.
*When I first tested this 3 ingredient watermelon ice cream, I used room-temperature coconut milk. Big mistake. The texture was slushy at best and separated into weird frozen chunks. Learn from my error: chill first.*
3. Combine everything in a high-speed blender
Add your partially frozen watermelon cubes, the solid cream from the coconut milk (scrape every bit out of the can), and your fresh lime juice. If your watermelon tastes a little bland, add the optional maple syrup now.
Blend on high for 45–60 seconds. Listen for the sound to change from chunky to smooth that’s your cue. You’re looking for a completely silky, pale pink liquid. Stop and scrape down the sides once if needed.
4. Taste and adjust
Here’s where you become the boss of your own ice cream. Dip a spoon in. Does it taste vibrantly watermelon-y? Can you taste the lime brightening everything up? If it’s too tart, add a tiny drizzle of maple syrup and blend again. If it’s too sweet (rare, but possible with extra-sweet melon), add another squeeze of lime.
5. Pour into your chosen container
I use a standard 9×5-inch loaf pan lined with parchment paper. The paper makes removal so much easier I learned this after spending ten minutes trying to chip ice cream out of a metal pan with a butter knife. Don’t be me.
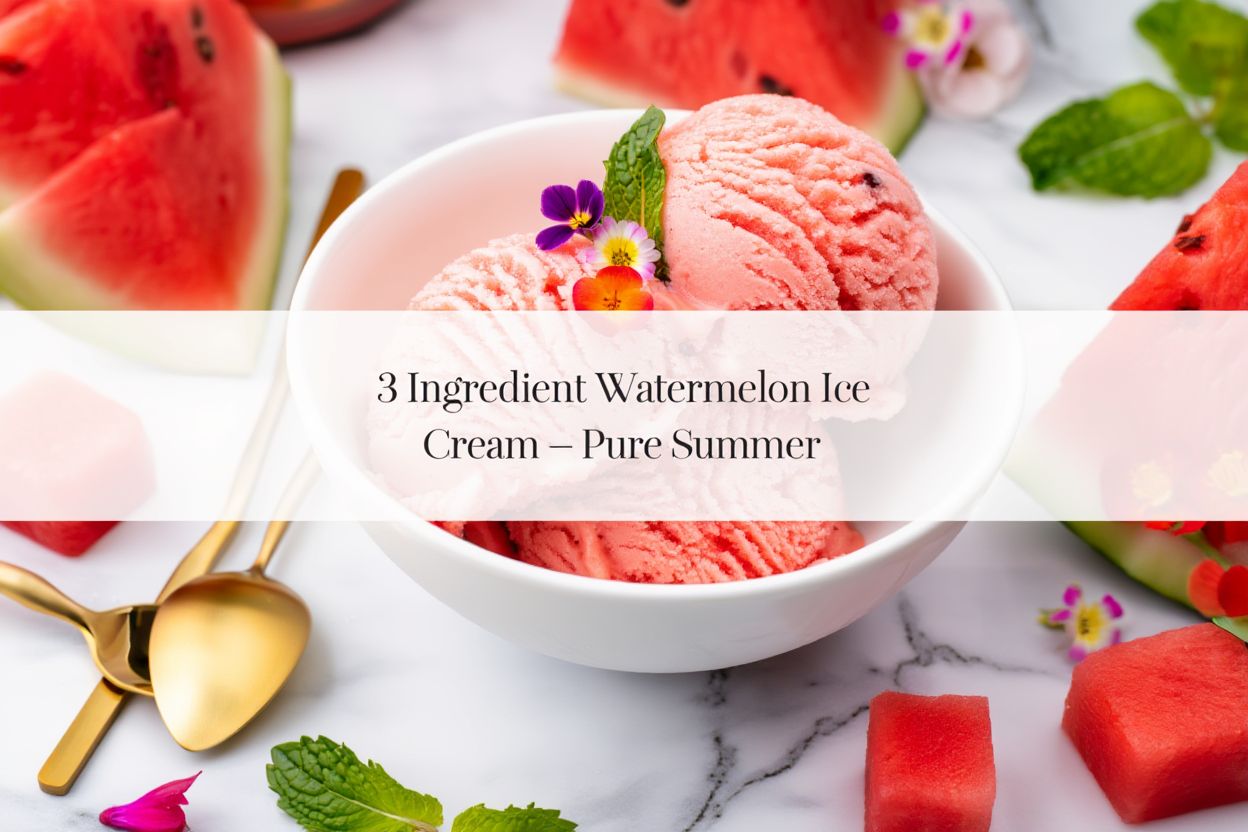
Pour the mixture in and smooth the top with a spatula. The color should be a gorgeous soft coral pink that honestly looks like a sunset.
6. Cover and freeze
Press a piece of plastic wrap directly onto the surface of the liquid. This prevents ice crystals from forming on top. Then cover the whole pan with foil or a lid. Freeze for at least 4–6 hours.
The hardest part of this entire recipe is the waiting. The aroma of watermelon and lime fills your kitchen as you’re pouring, and I’ve definitely been guilty of eating the pre-frozen mixture like a smoothie bowl.
7. Soften before serving
When you’re ready to eat, remove the pan from the freezer and let it sit on the counter for 8–10 minutes. This is crucial. Dairy-free ice creams freeze harder than traditional ice cream. Letting it soften slightly makes scooping possible without bending your spoon.
8. Scoop and enjoy
Run your ice cream scoop under warm water, then scoop into bowls. You should see a creamy, scoopable texture with tiny specks of watermelon fiber that’s a good sign. It means you used real fruit.
Pro Tips for Perfect Results
Don’t skip the lime juice. I know it sounds strange. Watermelon and lime? But trust me on this. The acidity does two things: it balances the natural sweetness and it lowers the freezing point slightly, which means your ice cream stays softer and more scoopable straight from the freezer.
Use the whitest part of the coconut milk. When you open your chilled can, you’ll see a thick white cream layer on top and watery liquid underneath. You want only the cream. The watery part will create ice shards. Save that liquid for smoothies.
The mistake I made three times: I used to freeze the watermelon overnight. Sounds efficient, right? Wrong. Fully frozen watermelon turns into rock-hard chunks that dull your blender blades. Twenty minutes in the freezer is the sweet spot cold enough to chill but still soft enough to blend smoothly.
Texture secret: For the creamiest 3 ingredient watermelon ice cream ever, blend the mixture twice. Blend once as directed, then let it rest for 5 minutes. Blend again for 30 seconds. This double-blending technique breaks down the watermelon fibers more completely.
Variations & Add-Ons
Spicy Tajín Swirl
This is my personal favorite for hot afternoons when I want something unexpected. Add 1 teaspoon of Tajín chili-lime seasoning to the blender. The heat hits your tongue right after the sweet watermelon cools it down. It’s incredible.
Creamy Coconut-Chia Version
Add 2 tablespoons of white chia seeds before blending. Let the mixture sit for 10 minutes before freezing. The chia seeds absorb liquid and create an even thicker, almost gelato-like texture. My health-conscious aunt requests this version every time she visits.
Minty Watermelon Fresh
Add 1/4 cup of fresh mint leaves (stems removed) to the blender. The mint makes the ice cream taste like something from an upscale juice bar. I grow mint on my kitchen windowsill specifically for this variation.
Berry Watermelon Fusion
Replace 1 cup of the watermelon with frozen strawberries or raspberries. The berry seeds add tiny pops of texture and turn the ice cream into a gorgeous deep pink color. My daughter says this version tastes like “summer in a bowl.”
Which variation do I prefer?
Honestly? The spicy Tajín swirl wins for me. The first time I made it, I ate half the batch standing at the kitchen counter. The combination of sweet, cold, creamy, and spicy-chili is genuinely addictive. But for kids or people who don’t like heat, the mint version is a close second.
Storage and Meal Prep Tips
Fridge storage: This isn’t ice cream you keep in the fridge. It will melt. Store it strictly in the freezer.
Freezer storage: Keep your 3 ingredient watermelon ice cream in an airtight container for up to 2 weeks. After that, ice crystals start forming and the texture degrades. Glass containers with tight-fitting lids work best.
Best reheating method: Wait, reheating ice cream? I mean best softening method. Take the container out of the freezer and let it sit at room temperature for exactly 8 minutes. Microwave even for 5 seconds? Don’t do it. You’ll get soup.
My weekly routine: I make a batch every Sunday morning while coffee brews. I pour it into four small individual glass jars with lids. That way, on hot weekday afternoons, I just grab one jar, let it sit while I change out of work clothes, and by the time I’m ready perfect individual servings. No fighting over portions.
FAQ Section
Can I make this 3 ingredient watermelon ice cream without coconut milk?
Yes, but the texture changes significantly. You can substitute full-fat Greek yogurt for a tangier, thicker ice cream. Or use 1 ½ cups of canned full-fat coconut cream for an even richer result. I don’t recommend dairy milk it makes the ice cream too icy.
Why is my ice cream icy instead of creamy?
Two likely culprits: your coconut milk wasn’t chilled enough before blending, or your freezer temperature fluctuates too much. Always use the solid cream from a thoroughly chilled can. Also, store the ice cream in the back of your freezer where temperatures stay most consistent.
Can I use frozen watermelon chunks from the store?
You can, but I don’t love the results. Frozen watermelon from grocery stores is often watery and less flavorful. Fresh summer watermelon makes a massive difference. If you must use frozen, thaw it slightly until you can break it apart with a fork before blending.
How do I make this lower in calories?
Replace the full-fat coconut milk with the same amount of unsweetened coconut yogurt. The texture will be slightly less rich, but you’ll save about 40 calories per serving. I’ve tested this, and honestly, I still prefer the full-fat version for special treats.
Can I double this recipe?
Absolutely. I double it almost every time. Use a larger blender or work in two batches. Pour into a 9×13-inch baking dish instead of a loaf pan. Freeze for 6–8 hours instead of 4. The doubled batch lasts my family of four about five days if we’re being careful.
Conclusion (Let’s Make This!)
After years of testing summer desserts, this 3 ingredient watermelon ice cream has earned a permanent spot in my freezer from June through September. It’s proof that you don’t need fancy equipment, hard-to-find ingredients, or culinary school training to create something genuinely delicious. All you need is ripe watermelon, chilled coconut milk, a squeeze of lime, and about ten minutes of patience.
I’d love to hear how yours turns out. Did you try the Tajín swirl? Did your kids ask for seconds? Is there a variation you discovered that I haven’t mentioned yet? Drop a comment below I read every single one and answer as fast as I can.
Now go beat that heat. Your blender is waiting. 🍉
Happy summer cooking, friends. Stay cool.
For more authentic recipes : duarecipes